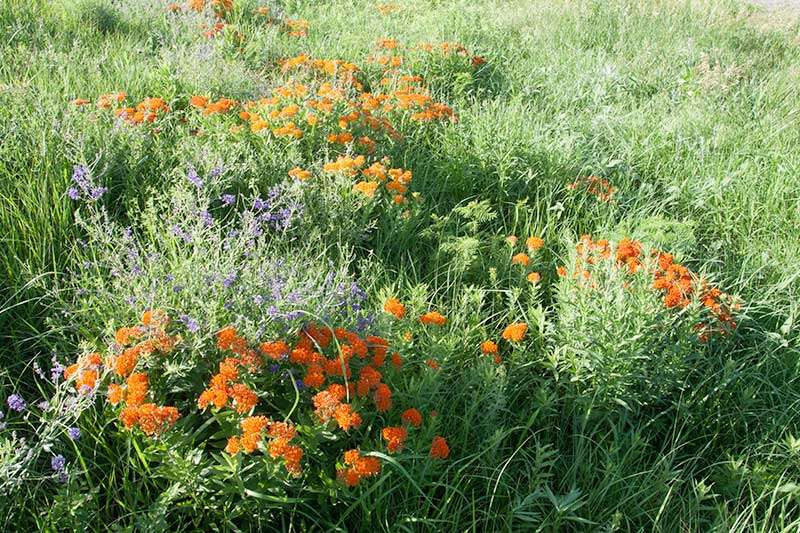
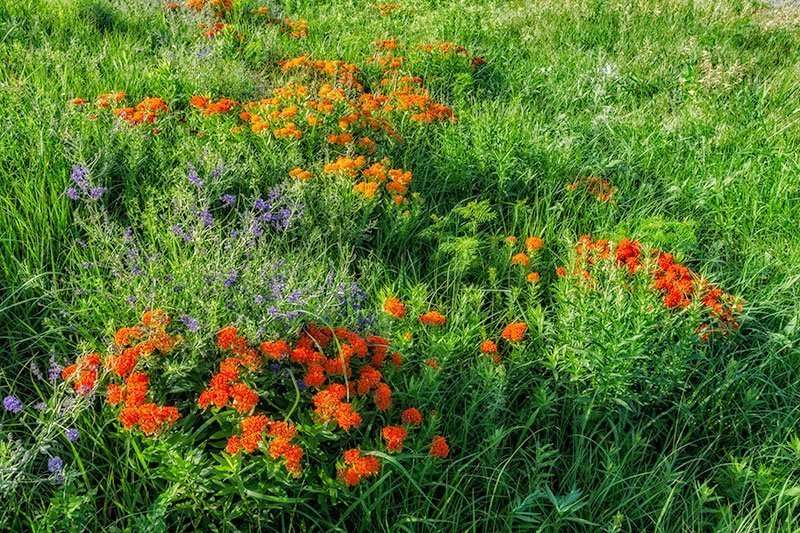
Thought I would provide a little insight and examples of what is most commonly refereed to as a cardinal sin in photography and that is shooting in bright sunlight. I don’t necessarily advocate doing your shooting in the middle of the afternoon on a bright sunny day but that alone shouldn’t stop you from practicing and refining not only your photography but your digital darkroom skills as well. Experiment and see what works what is exceptable and what isn’t.
I probably wouldn’t be writing this post and showing these two examples if it wasn’t for the recent upgrade of camera raw to 7.0, Adobe is to be given credit for really making nice improvements to the adjustments available, especially in the areas of shadows and highlights.
These two images are the same file, both shot some time ago with a Canon Xti body and Canon 17-40 f/4L lens. I’ve written before about how much I enjoy going back through some of my older images just to see if something strikes me that didn’t before. I decided to use this image because it met all requirements of the dreaded bright light shot. It was taken in late afternoon in June when the sun was still high in a bright clear sky.
I initially processed the image in camera raw 7.0 attempting to reduce all highlights as good as possible. This required running the highlight slider all the way to -100, this in itself made a big difference in the noticeable glare with the image, it did reduce the overall contrast so I added a little clarity as I usually do up to +25 on the slider then it was taken into Photoshop CS6. I won’t go to deep into the Photoshop processing because I believe that is where one’s vision of what they want starts to come into play and that can be very individual. But I will mention one other tool that I did utilize and that was the shadow and highlight adjustment. This is a very powerful tool and often overlooked and not used nearly enough in these type of shots, along with some minor contrast adjustments nothing else special was done to it, no color adjustments, saturation or even levels adjustments were made. The processed image seems to have taken on a more colorful look and appears to have had some saturation added but this was simply accomplished with contrast and highlight adjustments. I did also apply a slight Glamor Glow using Nik Color Efex 4 and reduce the highlights within it as well. I will play around with this effect on many images just to see what takes place, typically I’m looking for a slight softening of the image which also provides additional contrast, all done with only minimal effects which I believe is the key.
To sum all this up I think it is important to first and foremost don’t be reluctant to take the shot, don’t let all the preconceived notions stop you from practicing what your there to do and that is to get better at photography, you simply will not know unless you try. There are many things you can learn from the trying and practicing process. If you really like the scene plan on returning when the light is better which would be within the first hour of sunrise or an hour or so before sunset. If it would be around sunset I would highly recommend staying until after sunset when the light is diminishing and working on much longer exposures. This seems to be the time I produce many of the shots that I really like. If those options aren’t possible try shooting from many different angles and see if the glare is less, try to keep the sun on your right or left an not directly in front of you. Get down lower to your subject this will also change the angle of the sun. Try different exposures which may mean shooting with the highlights properly exposed and letting the rest go darker. You can then do adjustments to the shadows when processing instead of the highlights and see if this produces a more pleasing result, many times that can make a big difference in the overall feel of an image.
Most importantly use your camera and learn to make it work for you, put it to the test and see what happens. Shoot, learn, enjoy.


Good advise, Brad. There are challenges shooting in contrasty light but many times these can be overcome with a little technique and creativity. I would add that ACR v7 is only available for PS CS6 but the same tools are available in Lightroom 4 and they work very well
Yep your right Ken, Lightroom 4 does have ACRv7 and it’s great. I have been using CS6 beta so I alluded to that, Lightroom 4 is a wonderful tool. Thanks for the comment.
You are right, this act of practicing is vital to the development of our skills behind the camera and at the computer. We are also learning to listen to our gut.
Thanks for posting this article. This is very informative. I learned a lot! Practicing often will make me learn and become better. Try and try until we succeed!